This use case demonstrates how to implement User Defined Networks (UDN) in OpenShift Virtualization, allowing for network isolation between Virtual Machines within a namespace or across namespaces. User Defined Networks provide a way to create isolated tenant networks for VMs, separate from the default pod network, enabling more complex network topologies and improved security isolation.
Understanding User Defined Networks
User Defined Networking (UDN) in OpenShift is a feature that lets you create additional network domains inside your cluster beyond the default pod network. Each UDN is essentially a custom primary pod network that you define via a Kubernetes custom resource. These user-defined networks can be confined to one namespace or span several namespaces, providing flexible network isolation or connectivity as needed. In other words, applications can be grouped into their own isolated network segments (much like tenants in OpenStack Neutron networks) or multiple projects can be connected to the same shared network segment if desired.
Some key points about UDN in OpenShift
- Namespace-scoped CRD: UDN is implemented via a Kubernetes Custom Resource Definition. Specifically, OpenShift defines a UserDefinedNetwork CR and a cluster-scoped ClusterUserDefinedNetwork CR that represent these networks. A UDN CR is namespace-scoped, meaning it typically corresponds to a network dedicated to one project (or created within one project’s scope). For shared networks, a ClusterUserDefinedNetwork can be used by an admin to allow multiple namespaces to join the same network.
- Multiple networks per cluster: With UDN, OpenShift no longer limits you to a single pod network. Administrators can create distinct networks for different sets of namespaces, or conversely attach multiple namespaces to one common network, depending on application needs. For example, you might create one UDN for backend services and another for frontend services, or isolate each tenant/application into its own network. This provides enhanced isolation (no traffic between networks by default) as well as flexibility in topology.
- Layer-2 and Layer-3 networking: Each UDN can be configured in either layer-2 (L2) or layer-3 (L3) mode. In L2 mode, the UDN functions like a virtual switch or VLAN – pods on that network share an L2 broadcast domain and subnet. In L3 mode, the UDN is routed: each node hosting pods gets a unique subnet slice and routing is used between nodes (the UDN can integrate with routing protocols).The ability to choose L2 or L3 gives admins flexibility to prioritize simplicity (L2 for flat networks) or scalability and performance (L3 for routed networks).
- Custom IP subnets and overlaps: When defining a UDN, you specify an IP subnet (or dual subnets for dual-stack) to use for that network. You can even reuse the same subnet on multiple different UDNs, and they will not conflict – OVN-Kubernetes keeps them isolated and handles overlapping subnets internally. This means different user-defined networks can have identical or overlapping CIDRs, yet pods on those networks remain separate unless explicitly connected. This is a powerful feature for enterprises and telecoms, as it provides consistent and reusable IP addressing schemes across projects and clusters without risk of collision

Implementation Steps
Now as we have a basic understanding let us look into configuring User Defined Network (UDN) to be used by virtual machine.
[!NOTE]
- For Virtual Machines, only Layer 2 UDNs are supported as primary networks
- Layer 3 UDNs are NOT supported for virtual machines and they can only be used with regular pods, not VMs
Create a Namespace for User Defined Network
To use a User Defined Network, you must create a namespace with a specific label that enables UDN functionality. It is important to apply the label when the namespace is created.
apiVersion: v1
kind: Namespace
metadata:
  name: vm
  labels:
    k8s.ovn.org/primary-user-defined-network: ""
Create a User Defined Network
UDN is implemented via a Kubernetes Custom Resource Definition. Following is an example for same.
apiVersion: k8s.ovn.org/v1
kind: UserDefinedNetwork
metadata:
  name: vm-udn
  namespace: vm
spec:
  layer2:
    ipam:
      lifecycle: Persistent
    role: Primary
    subnets:
    - 192.168.150.0/24
  topology: Layer2
Verify that the UDN was created successfully.
oc get userdefinednetwork -n vmCreate a VM on the User Defined Network
As the namespace created above have the label for UDN. UDN becomes the primary network for this specific namespace. Any pod/VM created in this namespace will use the UDN as the primary network. VM will automatically use the UDN as its primary network. The VM should be created with the default network configuration.
apiVersion: kubevirt.io/v1
kind: VirtualMachine
metadata:
  name: example-vm
  namespace: vm
spec:
  runStrategy: Always
  template:
    spec:
      domain:
        devices:
          disks:
          - name: rootdisk
            disk:
              bus: virtio
          interfaces:
          - name: default
            binding:
              name: l2bridge
        resources:
          requests:
            memory: 2Gi
      networks:
      - name: default
        pod: {}
      volumes:
      - name: rootdisk
        containerDisk:
          image: quay.io/containerdisks/fedora:latest
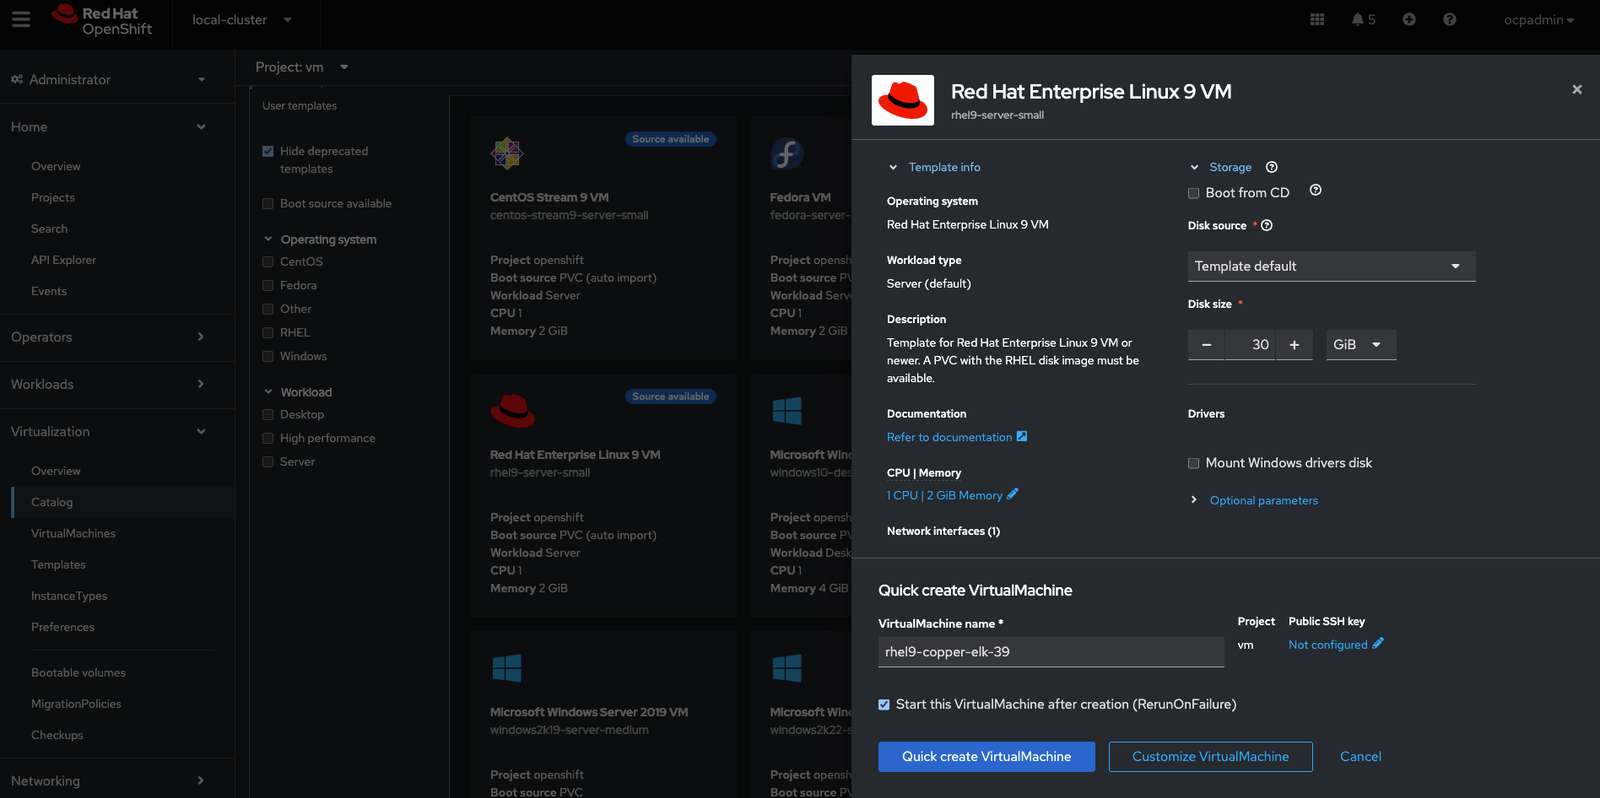
Or use the openshift console to create the VM

Do not modify the network configuration for the VM. The network configuration is automatically handled by the UDN system.
Test and Validation
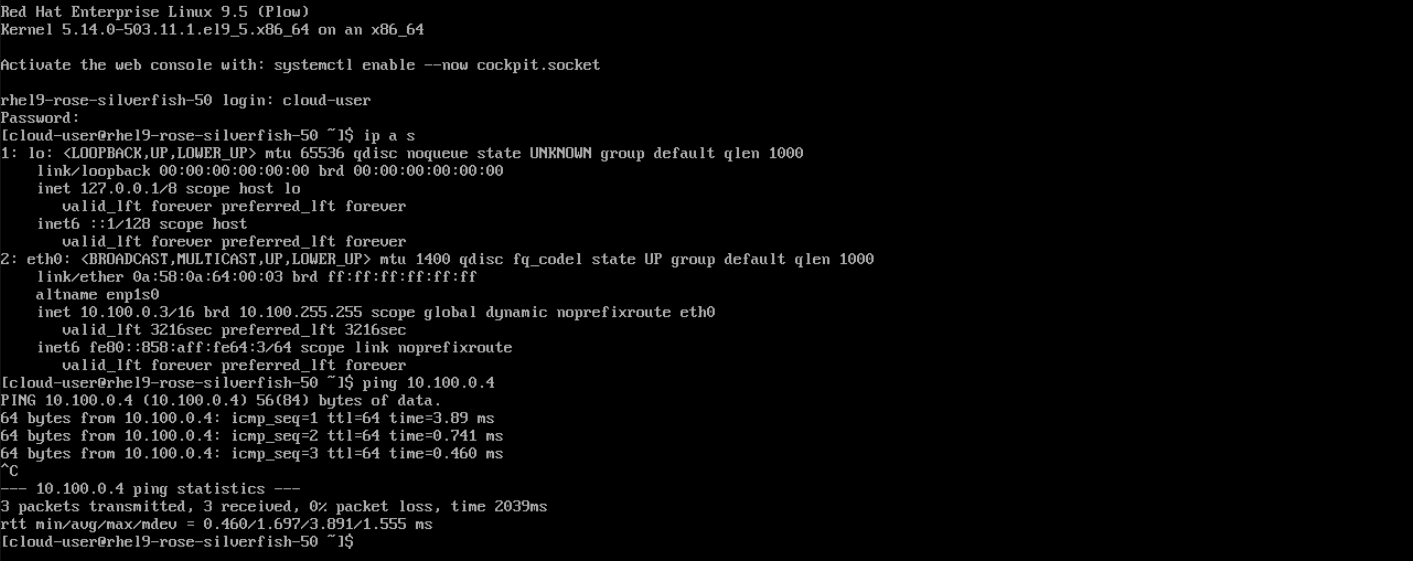
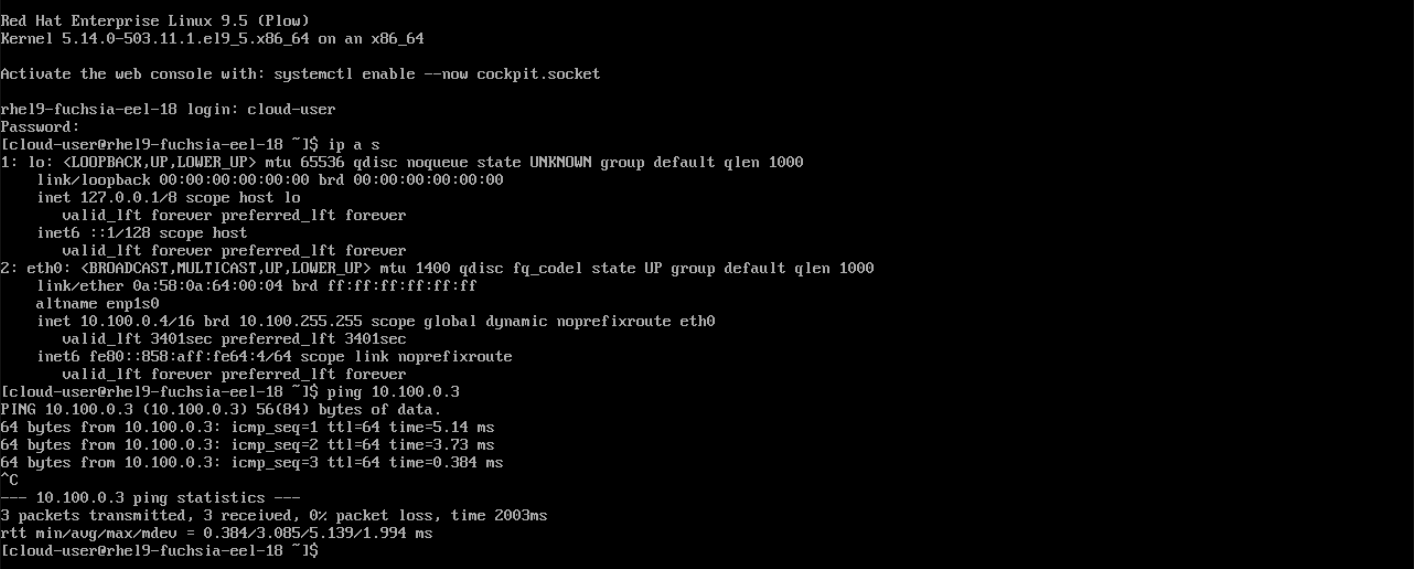
Connect to the VM created using webconsole and check the IP

Create a Cluster User Defined Network
A CUDN is a cluster-wide network resource. It allows you to share one custom network across multiple namespaces. In other words, you define the network once at the cluster level, and then you can attach many projects to it. This is useful when a tenant in a multi-tenant environment has multiple namespaces and you want them all on the same network segment. Administrators can use a CUDN to create a shared OVN (Open Virtual Network) overlay network across multiple namespaces. Like the UDN, the CUDN has its own subnet and topology, but it is not confined to a single namespace – it can be used by any namespace that is selected.
- Create the Cluster Defined Network
apiVersion: k8s.ovn.org/v1 kind: ClusterUserDefinedNetwork metadata: name: cluster-udn-web spec: namespaceSelector: matchLabels: cluster-udn: web-vm network: layer2: ipam: lifecycle: Persistent role: Primary subnets: - 10.100.0.0/16 topology: Layer2 - Create the namespaces
--- apiVersion: v1 kind: Namespace metadata: name: web-prod labels: k8s.ovn.org/primary-user-defined-network: "" cluster-udn: web-vm --- apiVersion: v1 kind: Namespace metadata: name: web-preprod labels: k8s.ovn.org/primary-user-defined-network: "" cluster-udn: web-vm - Verify teh Cluster UDN creation.
oc get clusteruserdefinednetwork
- Create two VM in each namespace using yaml or weconsole.
- Connect to each VM and ping each other


Conclusion
OpenShift User Defined Networking (UDN) feature marks an important step in Kubernetes networking evolution. It gives engineers the tools to create cloud-native network topologies that previously required either complex workarounds or external SDN solutions. By allowing multiple isolated or shared networks within a cluster, UDN provides greater security isolation, flexibility in application design, and the ability to meet specialized requirements (such as those in 5G and edge computing) on OpenShift.
As UDN matures (we can expect further improvements like local bridging support in future releases), it could become a cornerstone for building complex cloud-native architectures on OpenShift. Whether you’re deploying a cloud-native 5G core, isolating workloads for compliance, or simply need multiple network interfaces in your pods, UDN in OpenShift opens up a world of possibilities – bringing the power of software-defined networking directly into the Kubernetes platform.


