Downloading Offline Token
-
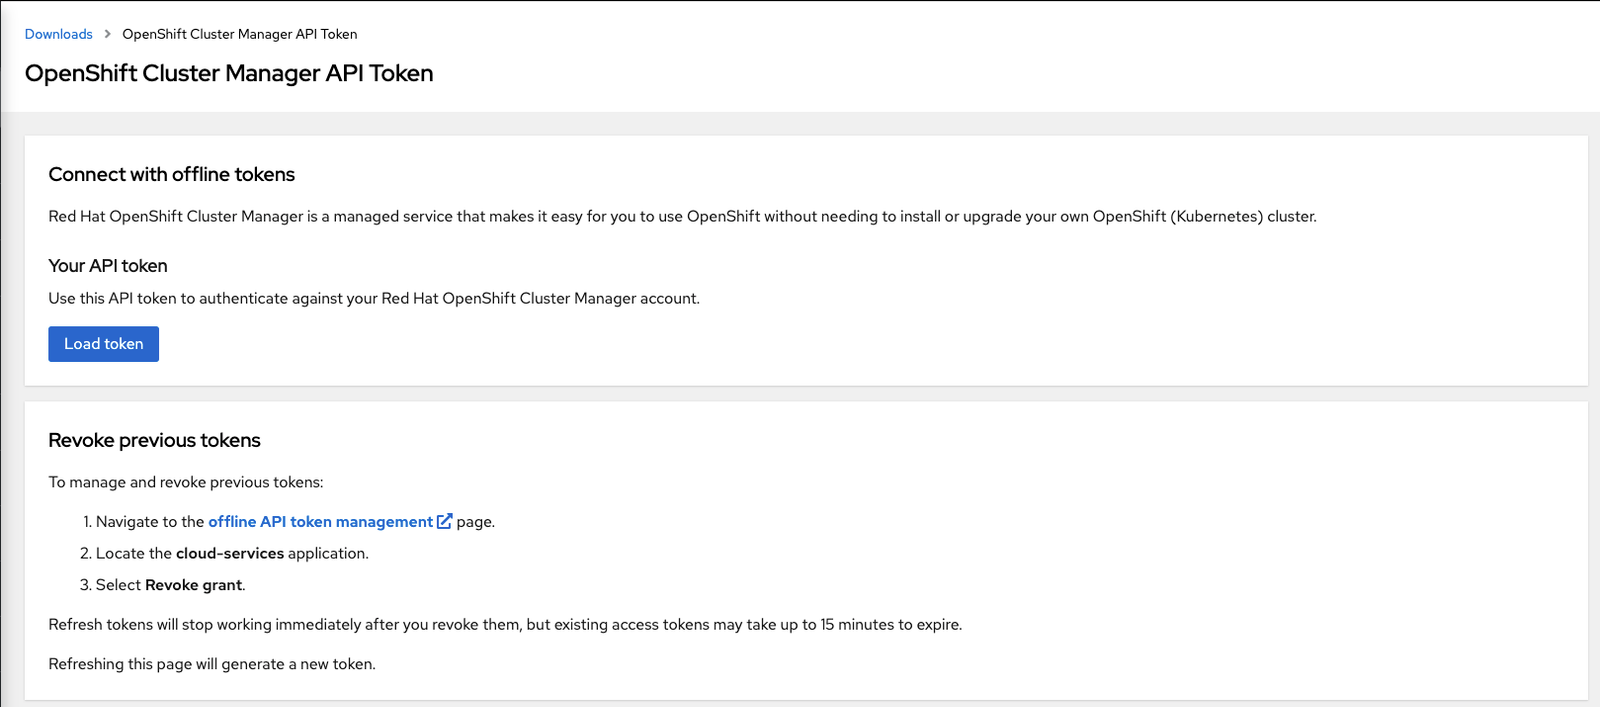
Click here to get the token
-
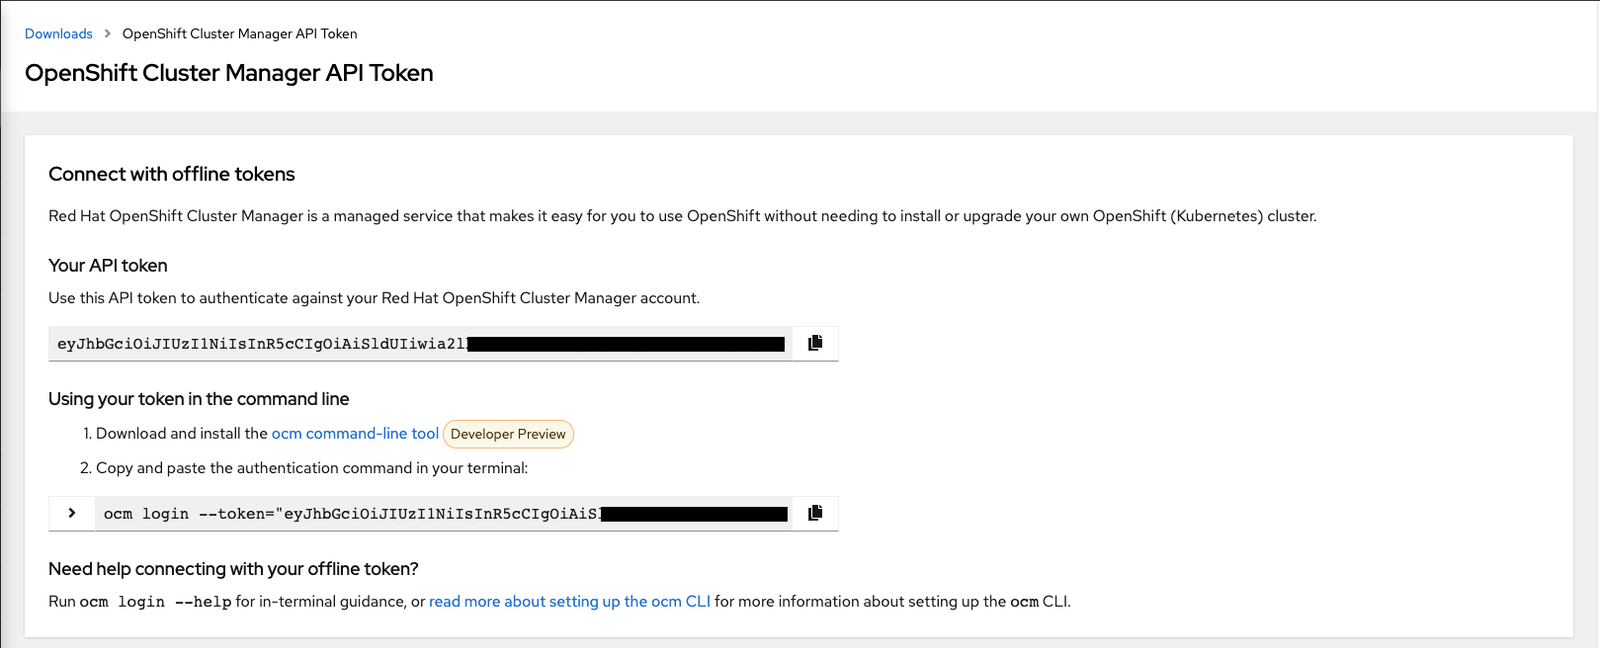
Click on Load Token
-
Use copy to clipboard function and provide it as a variable OFFLINE_ACCESS_TOKEN
OFFLINE_ACCESS_TOKEN="<PASTE_TOKEN_HERE>" export TOKEN=$(curl --silent --data-urlencode "grant_type=refresh_token" --data-urlencode "client_id=cloud-services" --data-urlencode "refresh_token=${OFFLINE_ACCESS_TOKEN}" https://sso.redhat.com/auth/realms/redhat-external/protocol/openid-connect/token | jq -r .access_token) -
Create a file (cluster-details) with following content. You can modfy this as per your environment.
export ASSISTED_SERVICE_API="api.openshift.com" export CLUSTER_VERSION="4.8" export CLUSTER_IMAGE="quay.io/openshift-release-dev/ocp-release:4.8.2-x86_64" export CLUSTER_NAME="test-rgrs" export CLUSTER_DOMAIN="home.lab" export CLUSTER_NET_TYPE="openshiftSDN" export CLUSTER_CIDR_NET="10.128.0.0/14" export CLUSTER_CIDR_SVC="172.31.0.0/16" export CLUSTER_HOST_NET="172.30.244.0/24" export CLUSTER_HOST_PFX="23" export CLUSTER_WORKER_HT="Enabled" export CLUSTER_WORKER_COUNT="0" export CLUSTER_MASTER_HT="Enabled" export CLUSTER_MASTER_COUNT="0" export CLUSTER_SSHKEY='<PUT-PUBLIC-SSH-KEY-HERE-AND-LEAVE-SINGLE-QUOTES>' -
Export the variables in your environment
#source cluster-details.sh -
Verify that you can communicate with API with following curl command
curl -s -X GET "https://$ASSISTED_SERVICE_API/api/assisted-install/v1/clusters" -H "accept: application/json" -H "Authorization: Bearer $TOKEN" | jq -r -
Now download the pull secret from here and put it in a file pull-scret.txt

-
Create a variable with raw content of pull-secret.txt file.
PULL_SECRET=$(cat pull-secret.txt | jq -R .) -
Create an Assisted-Service deployment.json file
cat << EOF > ./deployment.json { "kind": "Cluster", "name": "$CLUSTER_NAME", "openshift_version": "$CLUSTER_VERSION", "ocp_release_image": "$CLUSTER_IMAGE", "base_dns_domain": "$CLUSTER_DOMAIN", "hyperthreading": "all", "cluster_network_cidr": "$CLUSTER_CIDR_NET", "cluster_network_host_prefix": $CLUSTER_HOST_PFX, "service_network_cidr": "$CLUSTER_CIDR_SVC", "user_managed_networking": true, "vip_dhcp_allocation": false, "host_networks": "$CLUSTER_HOST_NET", "hosts": [], "ssh_public_key": "$CLUSTER_SSHKEY", "pull_secret": $PULL_SECRET } EOF -
Create the cluster via Assisted-Servcice API this will generate a “cluster id” whcih will need to be exported for future use.
curl -s -X POST "https://$ASSISTED_SERVICE_API/api/assisted-install/v1/clusters" -d @./deployment.json --header "Content-Type: application/json" -H "Authorization: Bearer $TOKEN" | jq '.id' "6c0d6c3a-7c4e-4a2b-9448-5a00a0195914" CLUSTER_ID="6c0d6c3a-7c4e-4a2b-9448-5a00a0195914" -
Update the cluster install-config via the Assisted-Service API
curl --header "Content-Type: application/json" --request PATCH --data '"{"networking":{"networkType":"OpenshiftSDN"}}"' -H "Authorization: Bearer $TOKEN" "https://$ASSISTED_SERVICE_API/api/assisted-install/v1/clusters/$CLUSTER_ID/install-config" -
Review your changes by issuing following curl command
curl -s -X GET --header "Content-Type: application/json" -H "Authorization: Bearer $TOKEN" "https://$ASSISTED_SERVICE_API/api/assisted-install/v1/clusters/$CLUSTER_ID/install-config" | jq -r apiVersion: v1 baseDomain: home.lab networking: networkType: Cilium clusterNetwork: - cidr: 10.128.0.0/14 hostPrefix: 23 machineNetwork: - cidr: 172.30.244.0/24 serviceNetwork: - 172.31.0.0/16 metadata: name: test-rgrs compute: - hyperthreading: Enabled name: worker replicas: 0 controlPlane: hyperthreading: Enabled name: master replicas: 0 platform: none: {} vsphere: null fips: false pullSecret: 'Your-Pull-Secret' sshKey: 'Your-SSH_KEY' -
Now you will see a cluster created in https://console.redhat.com/openshift/assisted-installer/clusters

-
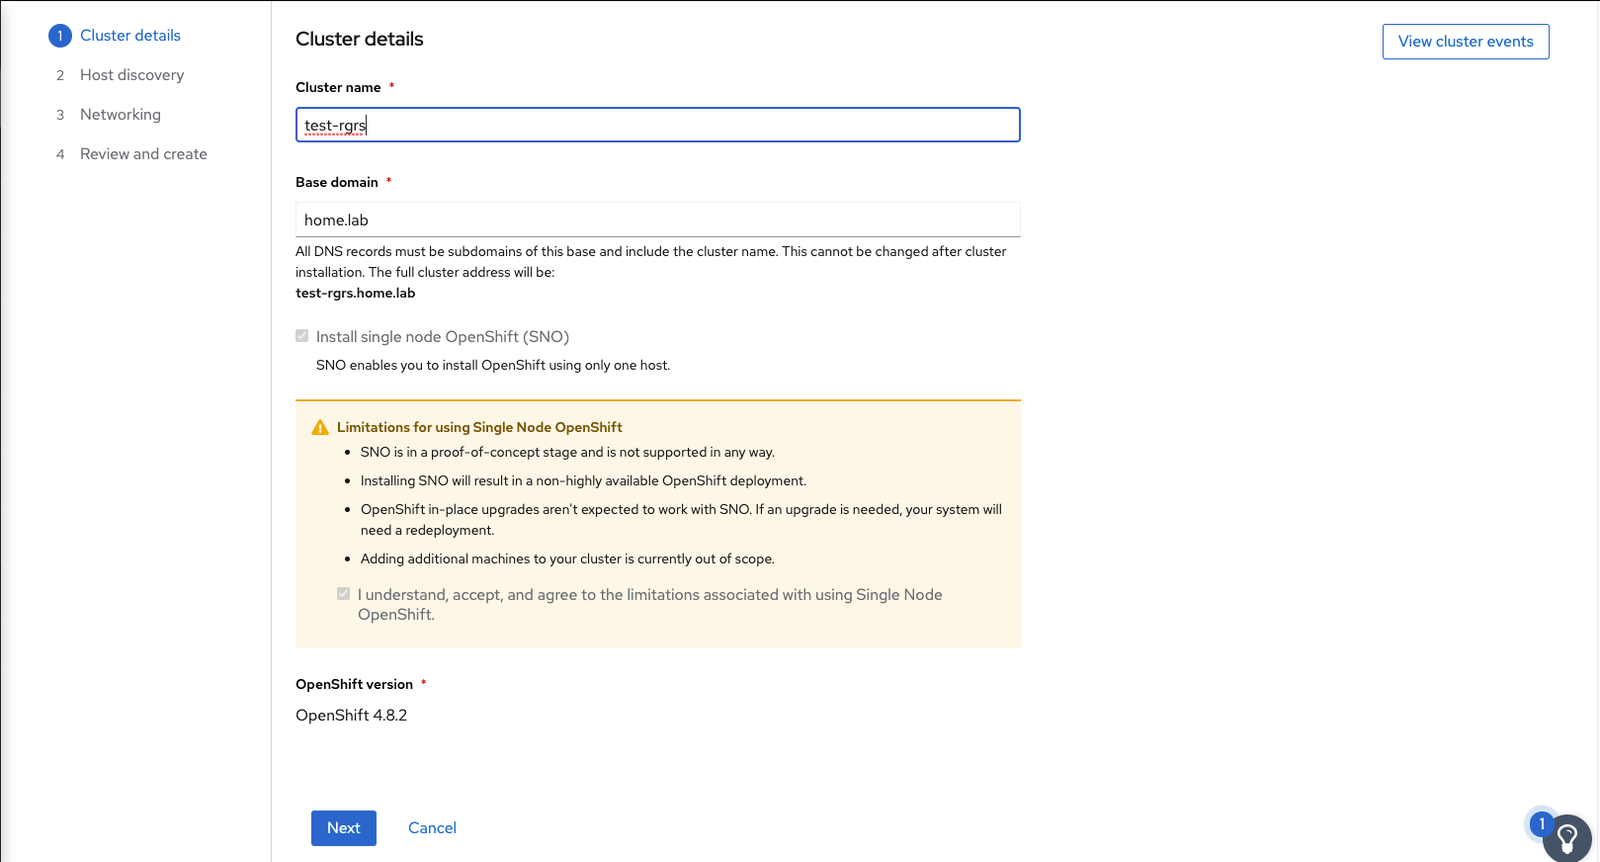
Click on cluster name for details. Review and click on “Next”
-
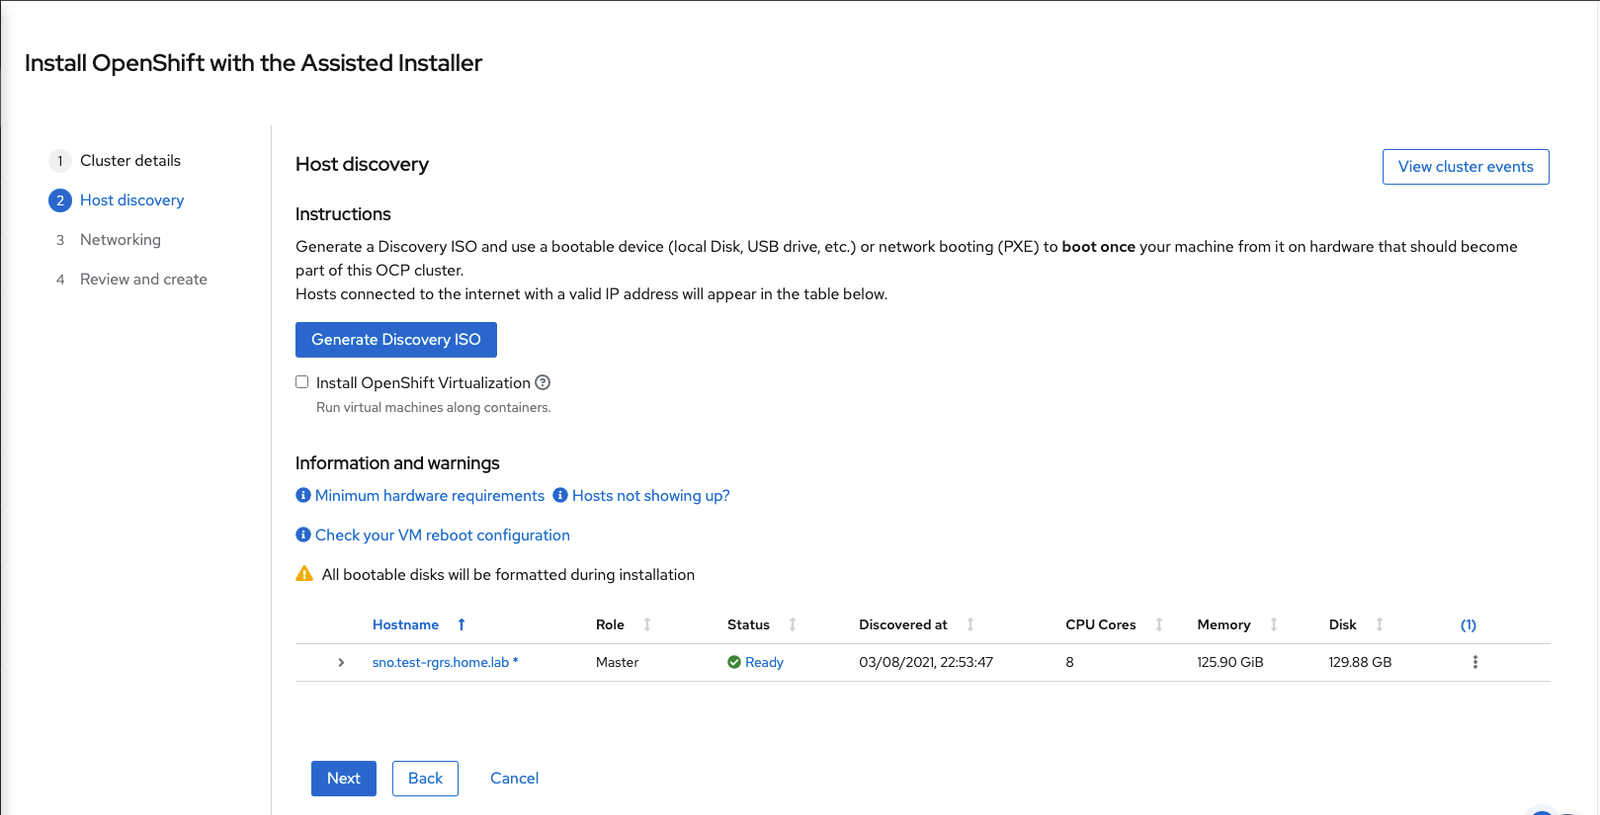
In Host discovery Tab click on Generate Discovery ISO button. Download the ISO and boot you VM/Baremetal with ISO.
-
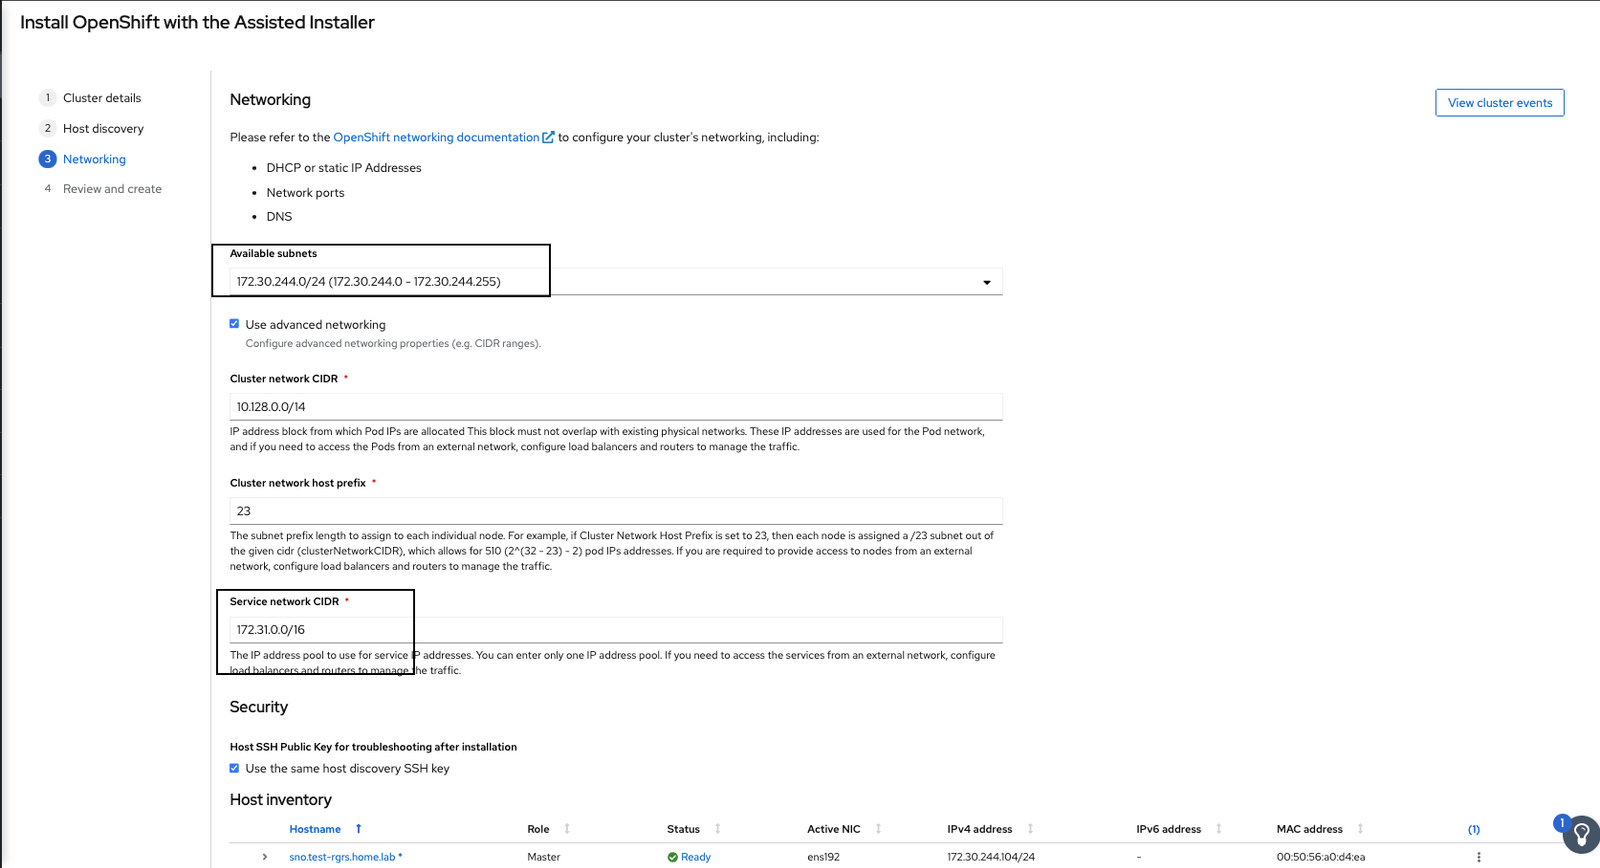
In the networking tab review the details of service ip. Note that service IP is the one which we specified in cluster-details file
-
Proceed to click on Next and Install the cluster
reference – cloudcult.dev
